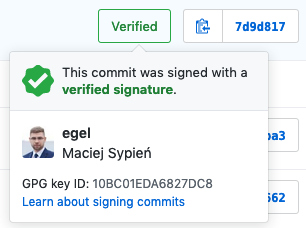
When I saw for the first time a commits with the mysterious "Verified" sign and I was told that someone can do this on its own, I wanted to do the same. Yes, I know it was silly - but I felt just like a small boy in a big shop of toys.After a moment when I was informed about this cool function, I started to wonder:In order to answer those questions, I did some research and found few post but one of them was following: "Why would I sign my git commits with a PGP key when I already use an SSH key to authenticate myself when I push?". This post gave me a reasonable answer, why we should sign commits, or at least sign the git tags.Ok, but I still had a the most important question for me:In order to answer this one, we must start from the very beginning.
The author made a relevant point, which is true. When you log in to any repository (Github, Gitlab, whatever...) you have to have an account, which can be used by you or someone else. Exactly, it doesn't mean that "you" is really granting it's you. It only saying that, this account, with this name, using given credentials can see/do some stuff in this place. Definitely, it's not saying that, let say, John Doe from Pima County Cemetery, Tucson, Arizona is really the John Doe we are looking for.
In this short definition (and also in further part), there is no phrase, which could indicate correlation between a digital identity and a person who use SSH tunnel. SSH is focusing on the machine from where some mystical person X use this secure shell connection in order to get access to server X. In other words this means if you have the given ssh key, you can access the machine without checking who is the user behind the wheel.
Well, how this corresponds to the original problem of securing the commits?
We have come at last to the place where the PGP keys enter to the scene. A creation of the aforementioned PGP keys and obligatory making them public in a trusted, available to everyone place, should give to the world (in definition) a certain assurance that "you is really you". Only the person who has private and the public key can sign the data with that key, e.g.: someone using your public key can encrypt the his message and only you, the person with corresponding private key could decipher the message. Finally, the last and IMHO the hardest part of that process, to use those keys wherever possible to emphasize that "you is really you" or in our case, "you, not someone else who is claiming to be you" created this commit.
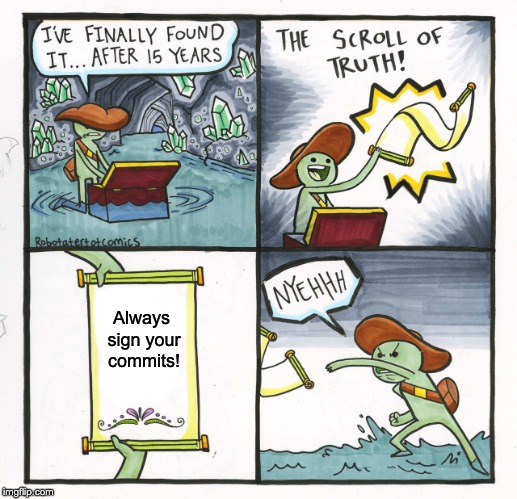
Before you do same, what the funny character from the cartoon already did, I want to show you a story why you should sign your commits (especially for programmers, which the creation of commits determine a daily basis) and what might happen in negative scenario when you will not sign them - A Git Horror Story: Repository Integrity With Signed Commits.
Open sesame!
Info
Disclaimer: the tutorial presented below has been made for OSX, but it should also be valid for Linux work
stations. The idea is completely the same, only the name of some tools to generate keys or 3rd party libs might change.Additionally and intentionally I didn't write directly my email address and I used a fake john.doe@gmail.com email.
To secure your commits, you will need:
git (user apple Xcode tools or install via brew brew install git)
gpg (important to use version 2, install via brew install gnupg)
dirmngr (it should be a part of gnupg installation via brew)
repository to store public keys (e.g.: Github, Gitlab)
PGP key
Let's start with creating your PGP key. You will use it to secure/identify the content has been made by you.
Error: Sorry, no terminal at all requested
If you already used some configuration and see something like:
plaintext
gpg: Sorry, no terminal at all requested - can't get input
Then go ~/.gnupg/gpg.conf and temporally comment no-tty option that block creating anything on machine (for security purpose, after this enable it again)
sh
gpg --full-gen-key
You will get few questions to answer (e.g.: name, email, comment, passphrase), which will be stored in your key and visible to everyone (it's not a good place to make jokes there - would you trust the clown 🤡? - me not 😉).
Tip
Personally, I do not recommend an empty passphrase and I'm opting for a 4096-bit key. The passphrase can be easily stored in gpg-agent for a desired period of time (e.g.: 1 day, 5 days, or more), so you do not need to type it all the time when signing your files.
Then, we have to get a reference to your key, so the git will understand, which key has to take in order to sign each commit. Below I wrote a command, which will give the list of all your public keys in the system - select the one you have entered.
sh
gpg --list-secret-keys --keyid-format LONG <your-email>
Now, you can take the PGP key ID to use it in Git. In my case, the key looks like this:
sh
gpg --list-secret-keys --with-fingerprint --keyid-format LONG john.doe@gmail.comsec rsa4096/EFJNQD3VCBZZBB9M 2019-03-17 [SC] CY2U VVNI HKVX JGOP QIWU E2NW EFJN QD3V CBZZ BB9Muid [ultimate] John Doe <john.doe@gmail.com>ssb rsa4096/EBEE77C5734494A6 2019-03-17 [E]
Use the PGP key ID, in my case, was EFJNQD3VCBZZBB9M.
All right. We have got the key, and now we need to get your public key, in order to make it publicly available (anywhere, somewhere!), so other people could verify if your public key is really you or it's just a fake key.
Below command will store the key to file and save it in your home directory.
Remember the public PGP key we have created? Now open your repository on "GPG keys" section (it should be called PGP, but this is a topic for a different story) in order to upload your private key and then you're almost done.
Git is able to sign all your commits automatically with the defined key. Then your produced content can be confirmed with "a reasonable assurance"2, that you are the author and did this work! Wicked!
Software configuration
I said before "you're almost done" because, for me, the full tutorial require recommended/explained configuration of the software presented to fully gain from the lesson.
So what we can configure here?
For some people might be important to not enter the PGP passphrase every time they want to create a commit. To do so, we have to changed some default configuration of gpg (or gpg-agent, which I prefer). For example, if you set up the ttl to: 5184000 (60 days), after first successful sign, GPG won't ask you again to fill the passphrase until this period will expired (or until you'll restart your machine)
Tip
It's not recommended by me to make the cache expiration long, unless you know that this might reduce your
security and make you setup vulnerable.
ini
# ~/.gnupg/gpg-agent.conf# Set the maximum time a cache entry is valid to n seconds. After this time a cache entry will be expired even if it has been accessed recently or has been set using gpg-preset-passphrase. The default is 2 hours (7200 seconds).max-cache-ttl 2592000 # 2592000 = 1 months# Set the time a cache entry is valid to n seconds. The default is 600 seconds. Each time a cache entry is accessed, the entry's timer is reset. To set an entry's maximum lifetime, use max-cache-ttl. Note that a cached passphrase may not be evicted immediately from memory if no client requests a cache operation. This is due to an internal housekeeping function which is only run every few seconds.default-cache-ttl 2592000
Use a secure program to enter your pin/passwords, like e.g.: pinentry.In order to install pinentry on OSX use brew:
sh
brew install pinentry-mac# check where pinentry-mac is storedwhich pinentry-mac/usr/local/bin/pinentry-mac
Then add the following configuration to your gpg-agent.
ini
# ~/.gnupg/gpg-agent.conf# Use following program as the PIN entry.
Better GPG configuration with dirmngr
ini
# This tells gpg to use the gpg-agentuse-agent# Make sure that the TTY (terminal) is never used# for any output.no-tty# Ensure that all keys are refreshed through the keyserver you have selected.keyserver-options no-honor-keyserver-url
Since the gpg configuration deprecates --keyserver and an option in favor of using dirmngr.conf and set up those options there.
Secure your private and public keys
After creating new pgp keys, when it are still new and shing it is recommended to secure your keys, together with you passphrase! Store all of them them in a save place (e.g.: in your password manager or print it on the paper and store in save place). Otherwise if you loose the private key or loose passphrase you may regret not doing it.
If you want that your key to be recognized by others, or to communicate with you, you can send your
public key to some servers. But before this make sure to create revocation certificate! Do not
ignore it as if your key has unlimited expiry period and after uploading to external servers you
will loose it (key or passphrase) it will be almost impossible to get it back.
I used "with reasonable assurance" phrase, as everyone could technically in some way get your key and signed the commits. Additionally in the past times I noticed if someone signed the commit and other person override it is was not enough visible at first glance who modified it last - usually was the author who commit first and save his/her email under the commit. Yes, I know, it's very confusing. ↩
Ok... but what exactly those verified commits really are for?
Why should I sign my commits with this PGP key? I already use SSH private/public keys.
Why and what for I should sign my commits?
"When you authenticate to Github with your SSH key, that authentication doesn't become part of the repository in any meaningful or lasting way. It causes Github to give you access for the moment, but it doesn't prove anything to anyone who is not Github." - HedgeMage.
"SSH is a cryptographic network protocol for operating network services securely over an unsecured network."1 - Wikipedia
pinentry-program /usr/local/bin/pinentry-mac
Note
This option is deprecated - please use the --keyserver in dirmngr.conf instead. Here you have a reference link for more details.
ini
# ~/.gnupg/dirmngr.conf# --keyserver URI## GPG can send and receive keys to and from a keyserver. These# servers can be HKP, Email, or LDAP (if GnuPG is built with LDAP# support).## Example HKP keyservers:# hkp://keys.gnupg.net## Example HKP keyserver using a Tor OnionBalance service# hkp://jirk5u4osbsr34t5.onion## Example HKPS keyservers (see --hkp-cacert below):# hkps://hkps.pool.sks-keyservers.net## Example LDAP keyservers:# ldap://pgp.surfnet.nl:11370## Regular URL syntax applies, and you can set an alternate port# through the usual method:# hkp://keyserver.example.net:22742## Most users just set the name and type of their preferred keyserver.# Note that most servers (with the notable exception of# ldap://keyserver.pgp.com) synchronize changes with each other. Note# also that a single server name may actually point to multiple# servers via DNS round-robin. hkp://keys.gnupg.net is an example of# such a "server", which spreads the load over a number of physical# servers.## If exactly two keyservers are configured and only one is a Tor hidden# service, Dirmngr selects the keyserver to use depending on whether# Tor is locally running or not (on a per session base).# keyserver hkp://pool.sks-keyservers.net # DEPRECATED DO NOT USEkeyserver hkps://keyserver.ubuntu.com# --hkp-cacert FILENAME## For the "hkps" scheme (keyserver access over TLS), Dirmngr needs to# know the root certificates for verification of the TLS certificates# used for the connection. Enter the full name of a file with the# root certificates here. If that file is in PEM format a ".pem"# suffix is expected. This option may be given multiple times to add# more root certificates. Tilde expansion is supported.# hkp-cacert ~/.gnupg/sks-keyservers.netCA.pem# This option enables OCSP support if requested by the client.## OCSP requests are rejected by default because they may violate the privacy# of the user; for example, it is possible to track the time when a user# is reading a mail.allow-ocsp# Append all logging output to file. This is very helpful in seeing# what the agent actually does. Use ‘ socket://' to log to a socket.log-file /var/log/dirmngr/dirmngr.log
 After a moment when I was informed about this cool function, I started to wonder:
In order to answer those questions, I did some research and found few post but one of them was following: "Why would I sign my git commits with a PGP key when I already use an SSH key to authenticate myself when I push?". This post gave me a reasonable answer, why we should sign commits, or at least sign the git tags.
Ok, but I still had a the most important question for me:
In order to answer this one, we must start from the very beginning.
After a moment when I was informed about this cool function, I started to wonder:
In order to answer those questions, I did some research and found few post but one of them was following: "Why would I sign my git commits with a PGP key when I already use an SSH key to authenticate myself when I push?". This post gave me a reasonable answer, why we should sign commits, or at least sign the git tags.
Ok, but I still had a the most important question for me:
In order to answer this one, we must start from the very beginning.